DevOps | Add an OAuth consumer(Application Links) to Bitbucket Server

Contents
How to add an OAuth consumer(Application Links) to Bitbucket Server ?
Create Application Links
Step1: 打开 Create Application Links 页面
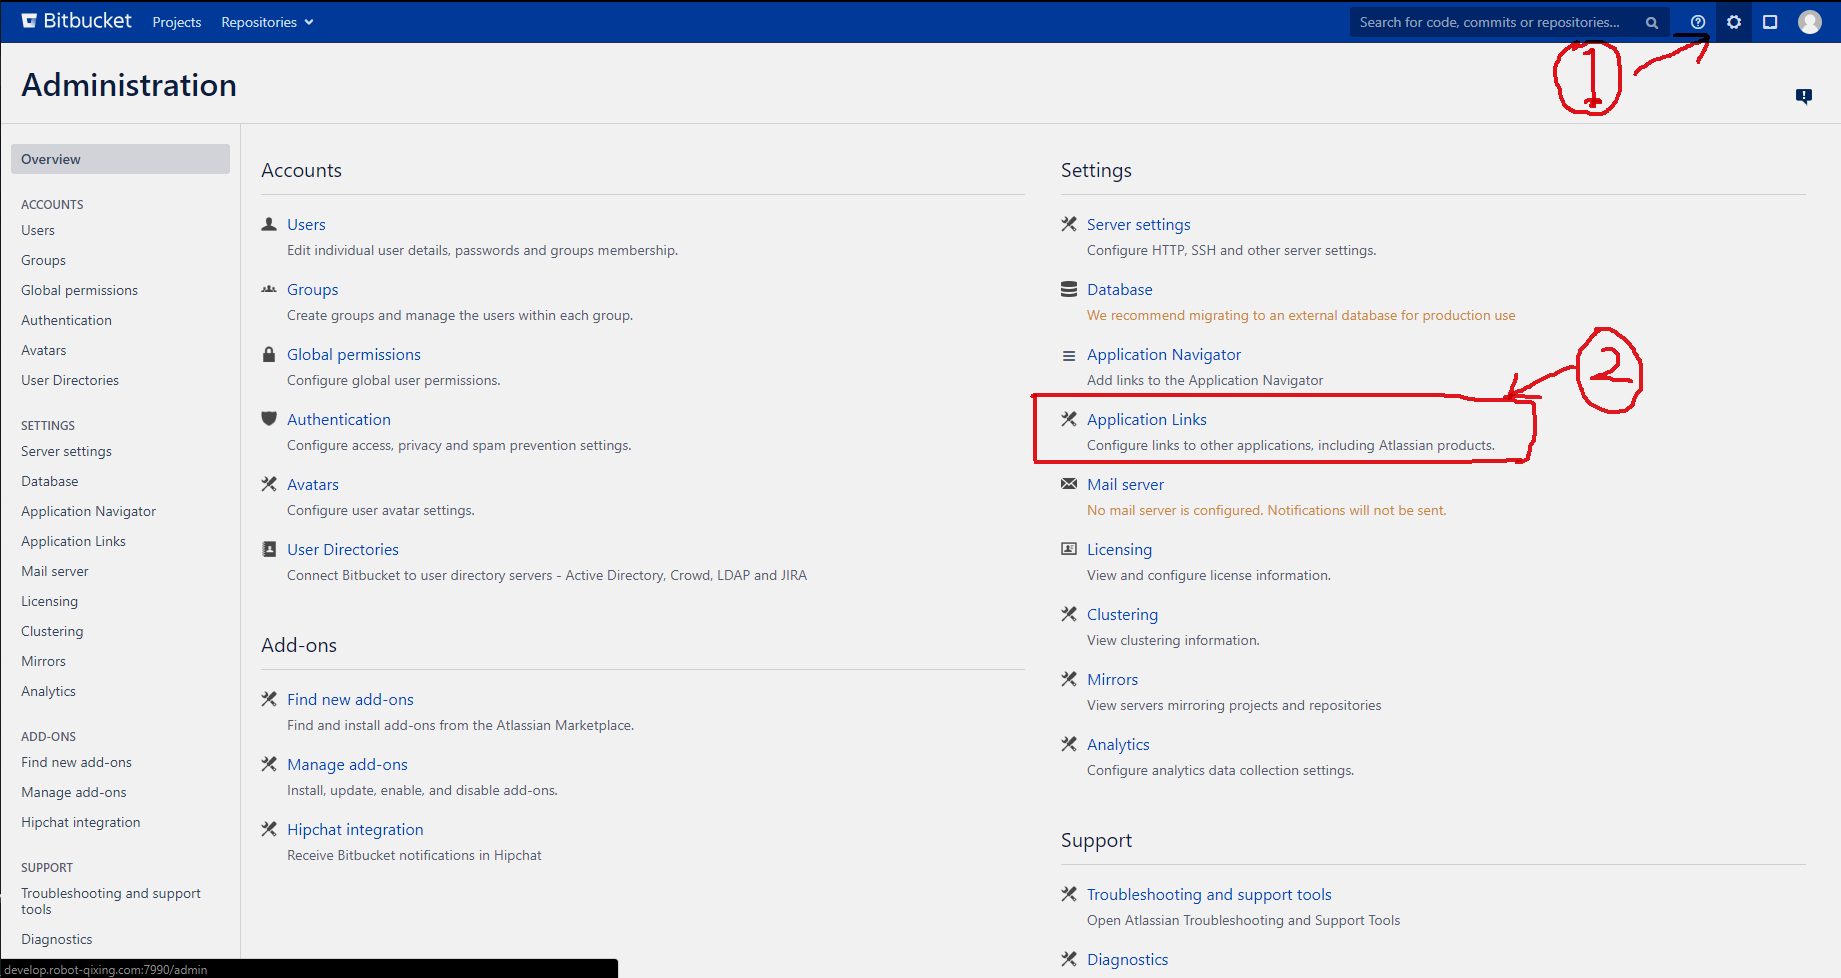
=> Continue
Step2: 创建 Application Link

=> Continue
Step3: 填写表单
|
|

Note:
Consumer Key对应 Drone 的构建文件(drone-compose.yml) 中的DRONE_STASH_CONSUMER_KEY, 保持一致即可。Shared Secret对应 Drone 的构建文件(drone-compose.yml) 中的DRONE_SECRET,保持一致即可。Callback URL这里没给出该表单字段,但这个可以在后面进行配置,具体怎么操作请继续看…
=> Continue
Step4: 填写表单

Consumer Key和上一步保持一致创建 Public Key File:
1
2
3
4
5
# create private key file $ openssl genrsa -out key.pem 1024 # create public key file $ openssl rsa -in key.pem -pubout -out key.pub- 打开
key.pub将内容完整的复制到上述表单的public key栏内。
Note: 这里生成的私有密钥文件
key.pem在部署 Drone Server 时需要赋值给DRONE_STASH_CONSUMER_RSA字段。=> Continue
Step5: 继续后会看到如下页面

Note: 但是,到这里还没完,因为上面提到的
Callback URL还没有配置呀! 这里也是踩到的坑之一:第一次没有配置 callback url,所以访问 http://drone_host:8000 后授权成功了,但是并没有重定向到 Drone 的 UI 管理界面 …. 😥 😥 😥- Update Drone Application Configuration
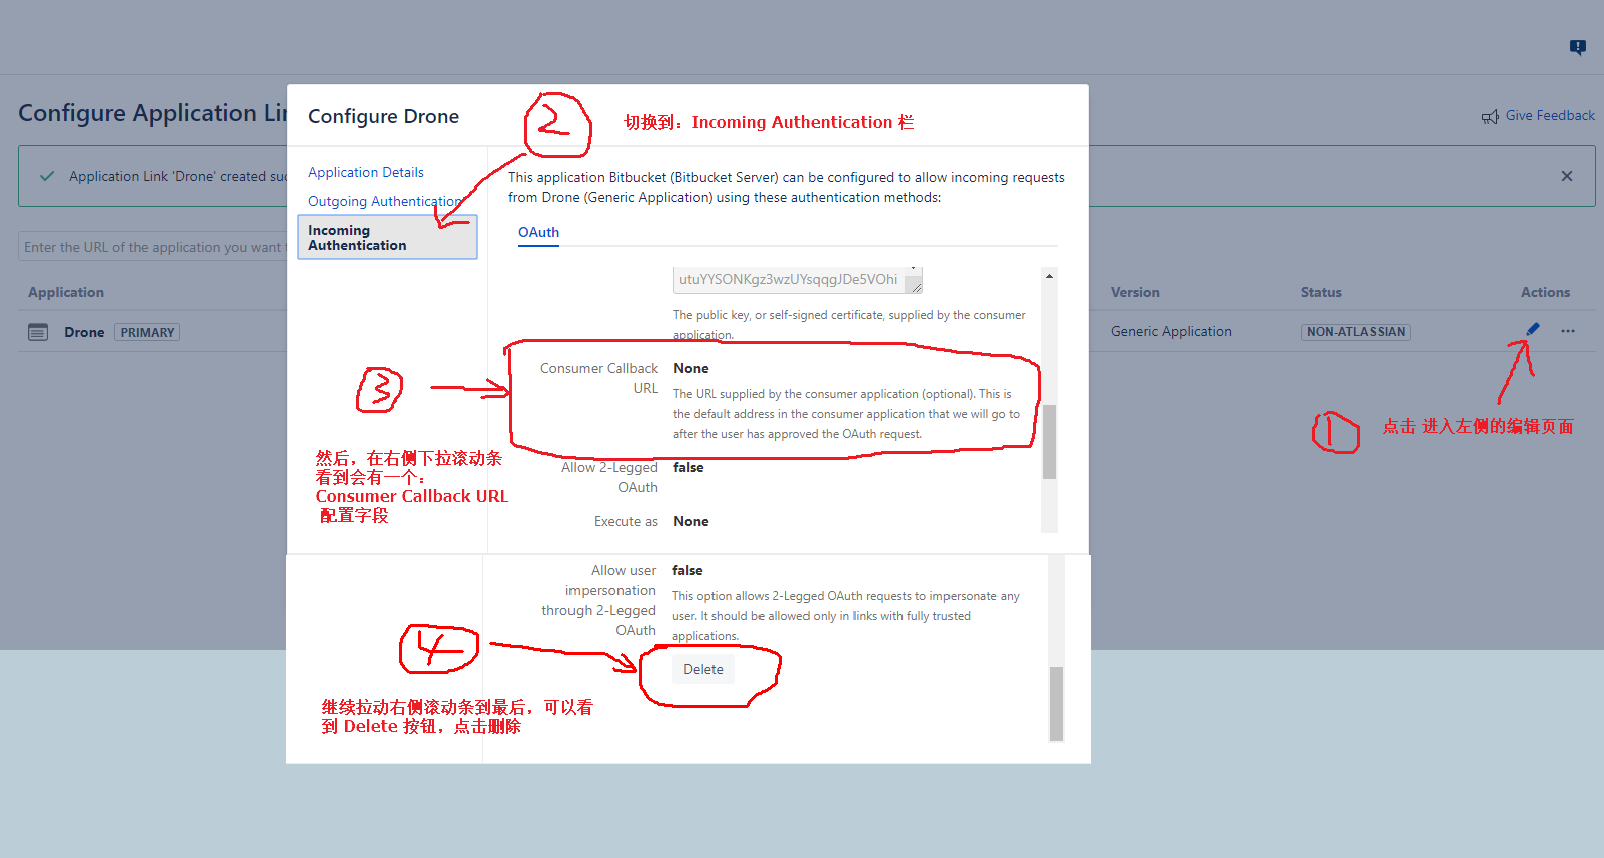
Note: 删除 Incoming authentication 的配置,然后重新添加
- Reconfigure Incoming authentication
再次填写表单,这次补充上 Consumer Callback URL 即可。
Step6: 完成验证
- Go to remote:

- 跳转后会看到如下页面:
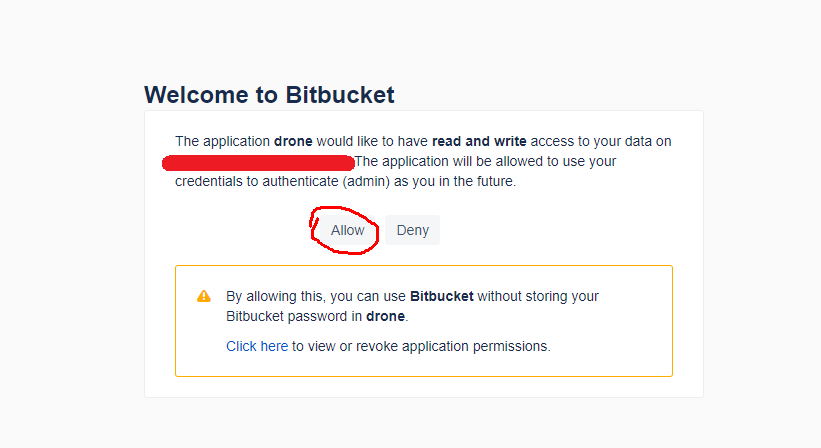
- 点击
Allow就会重定向到 Drone Web UI 界面了。
至此,完成。
See Also
Thanks to the authors 🙂
- 打开